Building on failure.
As you can assume from what my title says, I have failed to produce a working prototype. Due to problems with the wood I bought off of craigslist and well my overly optimistic mindset :p What happened here? I realized after the fact that I was not so much fighting with the wood but with the glue that binds it together....So cracks broke out in the middle of the surface eventually causing the joint to break as well. I also have to rethink the joint....obviously the nuts and bolts are just a stand in for a clean post screw. A new design might work with laminating two 1/16 veneer sheets together but i'll have to test that next time i'm back with design fugitives.
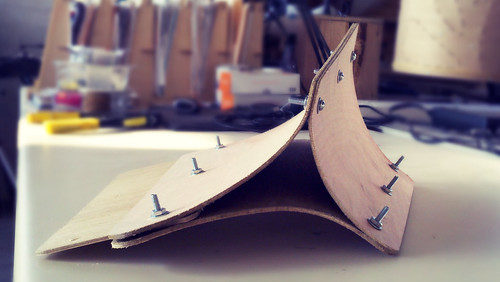 Single component - Broken components not shown
So coming back to LA with thoughts on how to bend ply wood I quickly applied a my revised thoughts (starting simple) to a case study for school. Here I took 1/8 veneer with all the wood grain going the same direction (of course by itself was very flimsy and weak). So this time around I went with laminating it with a vacuum bag removing the issues with the glue. Believe it or not, this 1/8" inch veneer can bend further than the previous 1/8" I had bought off of craigslist....so understand your laminated woods....
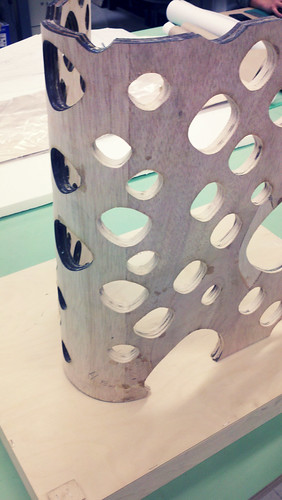
O_14 tower: Jesse Reiser
The end resulted in a very strong surface, of course it is not a closed shape...so its weak in one direction (close it and you should be good). Otherwise its exactly what I would have needed to build my prototype months ago....
Key things I've learned from this:
1: Its harder to bend plywood then just making it.
2: 5ply will crack less then 3 ply due to large differences in core thickness.
3: Vacuum bags works on dynamic surfaces. (go buy one)
4: And Perfect Grayish white paint is hard to get....
Hey Peter - What the process for the hole formation? was that cut prior to bending or after? Secondarily, how could hole formation affect the bending? Seems like a pretty simple parametric relationship between bending radius and perforation pattern. Very cool regardless! Ryan O
ReplyDeleteHey ryan! sorry for the late post i've been so busy i haven't had time to check this blog out. :( anyway are you asking about the hole formation on the 0-14 mockup? well the holes were simply made 2d in rhino (understanding where the bends would be in a flat plane, then applied to the 3d surface. After applying we trimmed the surface, then offset depending on the thickness of the material. Then we laser cut and then laminated all the surfaces on a mold and Vacuum bag. After that we cleaned up the holes. Presto!.... it was a bit time consuming but it got the job done. hope that explains the process of how to make one.
ReplyDelete